Saturday, October 25, 2008

Halloween Game

dracgame

Pin the Fangs on the Vampire
A fun Halloween spin on the old traditional
“Pin the Tail on the Donkey“ game.


I saw this a few years ago on DIY show called "Creative Juice" and thought it was so cute. We are having a big neighborhood halloween party next week and this will be a fun game for the kids in between munching on all the candy. I made a few modifications to their great design and have made a more user friendly pdf with all the elements on a few pages rather one page for each element. But if you'd like to see where the idea originally came from check it out. They show lots of other fun halloween games and decorations as well.

Materials:
16" x 20" frame

spray mount

sticky back hook and loop tape (such as Velcro)

spray fabric glitter

one package of 36“ x 36“ red felt (background and mouth)

9“ x 12“ felt in the following colors:

1 piece beige (face, ears and hands)

1 piece black (eyes, hair and pants)

1 piece white (fangs and eyes) 

2 pieces green (cape and eyes)

1 piece purple (cape collar)

2 pieces blue (jacket)

clear rhinestones (eyes)

red rhinestones (buttons)

Fabric-Tac glue

1. Remove the cardboard backing from the picture frame, and trim a piece of red felt to 18“ x 22“ to fully cover the backing. Using spray adhesive, spray the cardboard backing, and mount the felt to the cardboard, leaving some overhang. Smooth out any wrinkles, and place the felt-covered backing back in the frame.
2. Using templates provided, cut out the shapes, and glue into place using Fabric-Tac glue. NOTE (not on template): Cut one green 9 x 12 in half to have two 4.5 x 12 strips and angle to match purple cape sides. Use one full blue 9 x 12 felt sheet for each arm/side Angle 9" side to match cape hood and roll end inward to create the sleeves.
3. Once all pieces are glued into place, add rhinestones to accent the vampire's eyes and as buttons for his jacket.
Optional — Add spray glitter for flare. (I may have gone overboard with this part) If using spray glitter allow about one hour of drying time before playing.
4. Attach strips of sticky back hook and loop tape to each set of fangs using only the “hook“ portion of the hook and loop tape.
5. Hang on the wall for hours of fun.


zanddrac

Z sure likes it! Hope the other kids do too! Enjoy!


I have entered this on livinglocurto.com. Check out all the other great Halloween posts there too.

Wednesday, October 22, 2008

Storm Trooper Beginnings


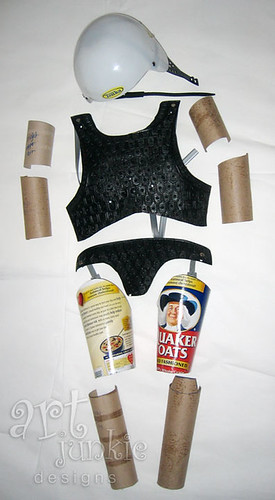
It doesn't look like much right now, but yes, believe it or not this *WILL* become a Storm Trooper costume! I've got a lot of work ahead of me and time is running out. Tonight Z and I worked on taking measurements and then roughing out the basic shapes. We used a few thrift store finds and household recyclable items to get started. A beat-up and slightly broken knights breast plate was a great find! It's made of a soft plastic that was easy to cut. After the decorative dragon and "hardware" were removed it was cut up to make both Trooper torso parts. Paper towel rolls and a Quaker Oats container will be the arm and leg plates. The Tonka helmet was another thrift store find that had a rim and face shield. I cut those off and will sculpt the rest of the Trooper helmet with paper mache. All of the pieces will get sculpted with paper mache to add the detail, then painted white and coated with a sealer. (At least that is the plan...)

I have already secured black leggings, black turtleneck, boots (which will have to be painted white and black gloves. It may not be 100% accurate, but we're having fun. Wish us luck and check back to see the progress!

Wednesday, October 15, 2008

Halloween Books

books

A dear friend gave me this book last weekend because he thought it "looked like something I'd like". There is no way he could have known exactly how much it would mean to me! This is one of my all-time favorite poems called "The Spider and the Fly" by Mary Howitt, written in the 1800's. The illustrations by Tony DiTerlizzi (love, love, love) are superb and the black and white, dark and dusty, victorian look matches the subject matter nicely. It always spooked me, yet the rhyming lines sucked me in again and again. =) It's a wonderful cautionary tale that has been given new life with it's own beautifully illustrated, hard bound book. No more will I have to dig through the pages of an old tattered book of poems. Thanks so much D.M.!

books books

And since I'm still hung up on Halloween here are a few more fun books to celebrate the season. "Skelly the Skeleton Girl" written and illustrated by Jimmy Pickering. The story is quite cute and the illustrations are fantastic! The next book was a fun find. My dad cleaned out the basement and found lots of old books that belonged to me and my cousins. This version of "Little Witch" was published in 1973 and was a Scholastic school book for 50¢. Those were the good ol' days. I haven't read it yet, but I thought the cover illustration was so charming.

books

The last are books that have been recommend or have great art. I haven't had a chance to check them out either, but now they are on the radar to find. Happy Halloween reading!

Frank was a Monster Who Wanted to Dance by Keith Graves
Everything I Know about Monsters by Tom Lichtenheld
Boris and Bella by Carolyn Crimi Illustrated by Gris Grimly
Three Little Ghosts by Pippa Goodhart Illustrated by AnnaLaura Cantone
Cinderella Skeleton by Robert D. San Souci Illustrated by David Catrow
I'm Going to Eat You by Matt Mitter illustrated by Jimmy Pickering

Sunday, October 12, 2008

Test Tube Halloween Treats

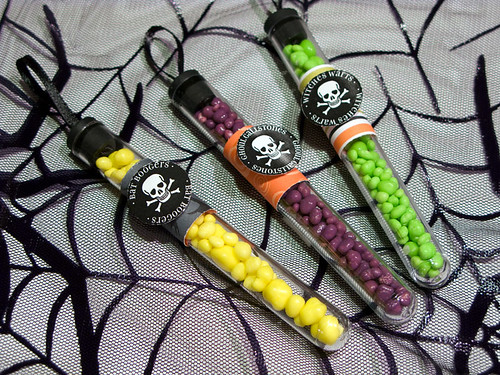
These were so much fun to make and a BIG hit with the kids today. "Did you really pick bats boogers?" Of course I did! How else do you get Bat Boogers?? You should have seen what I had to go through to get the Ghoul Gallstones! ;)

boogers


These are a quick, cheap and fun halloween treats. I paid about $9 (including shipping) for 72 little test tubes and 1 lb. of caps! I chose the caps with small holes and opted to make ribbon loop hangers for them. But you can also get solid caps. I wish I had gotten one of the little stands for them too...

To make the labels: Cut a 2" x 1" strip of halloween patterned paper and adhere to the tube. Using a 1" circle punch, punch out label. You can download a set here to print for yourself**. Affix with glue dot or stampin dimensionals. Add your favorite flavors of Nerds candy, and voila, instant tasty-gross treats the kids will love!

** for your personal enjoyment only!.

Monday, October 6, 2008

IF- Sugary

Yes, I am a few days late with this one and haven't done one for every week... ah well. I am trying! =) 

IF- "Sugar"y


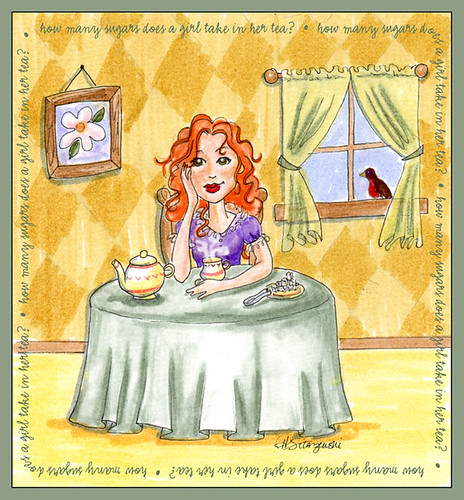
The Torrey Girl gets to come out and play again. "How many sugars does a girl take in her tea?" A boy should certainly know after 9 months...

Enjoy.

Noticed after posting and taking another look how everything in this illustration tilts up from left to right. The base board is the most level part. Does this mean I am optimistic with a somewhat level base. Or just oddly off kilter?? LOL. The world may never know!