I hope you had a great Halloween! We sure did here at the Zooski household. I had tons of projects planned for the month and as you know the best laid plans sometimes go awry. Now that the festivities are over and I feel like I have a moment to breathe, I'll share some of the handmade goodies that were actually completed.
For this first post,
the costumes.
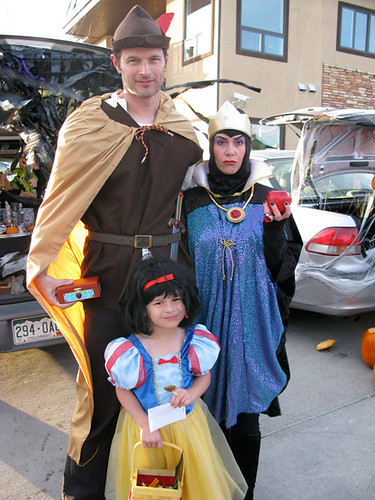
I was feeling a little guilty for not going "all out" and completely making our costumes this year. Although they started from thrifted and second hand pieces so it wasn't *so* bad. Z found the Evil Queen costume on a thrift store excursion and insisted that I get it to wear for Halloween. He let me know that if I would wear the Evil Queen he could be Snow White. (We do love our themed costumes.) And no, it wasn't odd for me to hear my 5 year old boy asking to dress as a girl (although the conversations that ensued from the simple question of "What are you going to be for Halloween" are topic for another blog post). He's very creative... and so I agreed, the Evil Queen costume was pretty cool and even if he changed his mind I wasn't out a lot of $$$.
The hunt was on to find a used Snow White dress. As much as I love the Disney Store costumes I couldn't bring myself to pay $30-$60 and the off brands are usually not made very well. Plus, I was feeling guilty, remember. I scoured craigslist and found a few then finally made the pick-up one sunny day in mid-September, all the while wondering if he would change his mind. He was pretty excited about it though, so I ran with it.
For the Snow Whiite costume I purchased new white tights and wig. I found some cute sparkly red shoes at Gymboree (from last year) on sale for $5. Bonus! Now for a bit of the handmade: I did alter the dress by removing the medallion on the front of Snow White's face and replaced it with the bow. I also added a zipper instead of the two cheesy velcro "buttons" on the back. Much better! Plus I painted a little wicker basket yellow, made a red fabric liner for it, sprayed it with glitter and tied a red bow around it.

The Queen's costume came with the crown and an odd piece of cording I couldn't figure out what to do with (at first). It became the "chain" for the medallion necklace. The medallion is made from a metal jar lid, the metal end from refrigerated biscuits, some paint, a sparkly red gem and glitter. Again I removed the Queen's face from the costume and the crown. My new medallion necklace covered up the spot perfectly, and looked much better than the Queen's face. I think that's silly, you know who the character is, you don't need a little picture to show you. I also sewed in some wire to the collar to make it bend the way I wanted and not just flop around.
So now all that was left was the balaclava (the head piece), I
had to make it because I couldn't find one. Had I known how difficult it was going to be to make I may have looked a little harder to find one! It was a great learning experience however, and after a few failed attempts I now I have a working template. You know, in case I need to make a dozen more for some reason! But for the record I scored a scrap piece of fabric at Joann's that matched the black fabric of the costume perfectly! I wish I had actually made a new crown that was a bit more accurate, but I ran out of time.
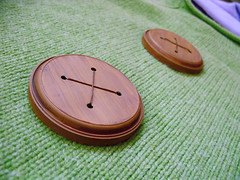
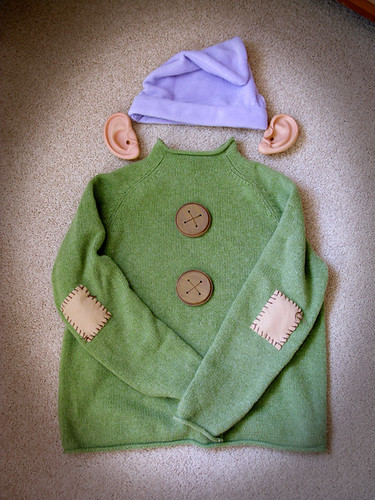
Z and I got to wear our costumes at the Disneyland Happy Halloween party first. My best friend from Texas was with us on the trip and she dressed up like Dopey. We found a green sweater at a thrift shop for her and I embellished it with patches on the sleeves and button on the front. I had been itching to use the lids from Z's little microwavable meals as buttons for a while but couldn't seem to come up with a project to use them on. This was perfect! I just primed and painted them brown to look like little wooden buttons and sewed them on with embroidery floss. They already have the 4 holes in the center, they couldn't have been more perfect! I made her hat with lavender fleece (from my fabric stash) and we got her some big ears (which didn't stay on very well - I even tried to to sew them to the hat, but that didn't work very well either). Poor thing, it was too hot to wear a wool sweater and fleece hat in California anyway, so we had our picture taken together real fast and she changed. Bummer... but you know it was snowing in Colorado when I left, so a sweater seemed perfectly reasonable! And, the picture was taken with her camera, when she sends them to me I'll add it!
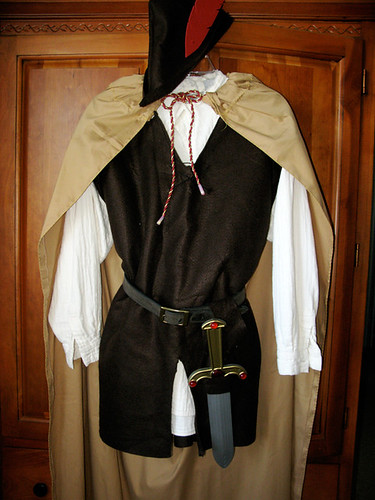
Back home the festivities were far from over. We had a Trunk-or-Treat event at school and of course we had to plan Daddy to be in on this somehow too. I suggested he wear the Dopey outfit, to which he adamantly refused. Early on we had talked about him being the Huntsman and I was trying to save myself a little work since the Dopey getup was already done. Alas, I whipped up a few Huntsman pieces too. I used last years
Han Solo shirt, another thrifted piece for the vest which I cut off at the bottom to be able to use the same fabric for the hat and sword sheath. A piece of red craft foam made a nice makeshift feather! I embellished a thrifted dagger with more red sparkly gems, and used a thrifted piece of fabric for the cape (tied with a piece of cording left over from my handmade Beauty and the Beast Enchanted Christmas dress). I think it turned out pretty awesome for a last minute effort.
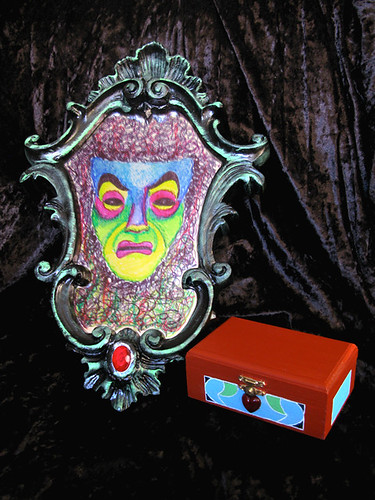
I made a few other props for us as well. The Queen needed her Magic Mirror after all. And the Huntsman needed the box to put the heart in. Neither of which are accurate, but they get the point across. So my not-so-handmade-halloween does have lots of handmade elements but most importantly made a little, 5-year old kiddo very happy! And they lived happily ever after.
The End.