Showing posts with label holidays. Show all posts
Friday, December 10, 2010
Sweet Holiday Gift
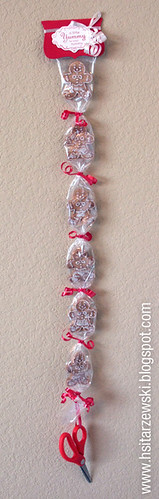
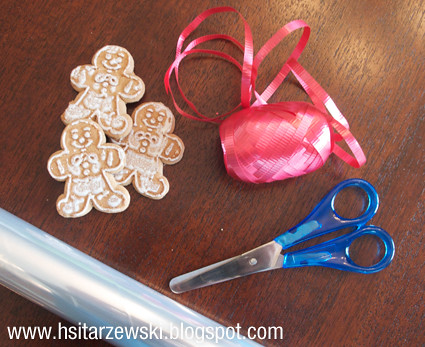
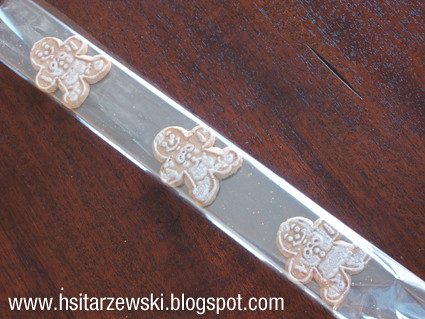
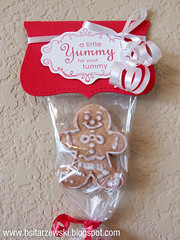
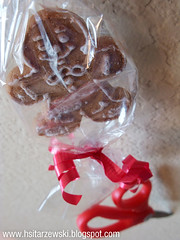
Need a cute, inexpensive gift for the holidays? Then I've got the perfect solution for you (courtesy of a brilliant idea from my Mother-in-law)! A cut-as-you-go cookie strip complete with scissors to snip the yummy treats . All you need is a roll of cellophane, ribbon, small safety scissors and cookies (pre-made or homemade).
WHAT TO DO:
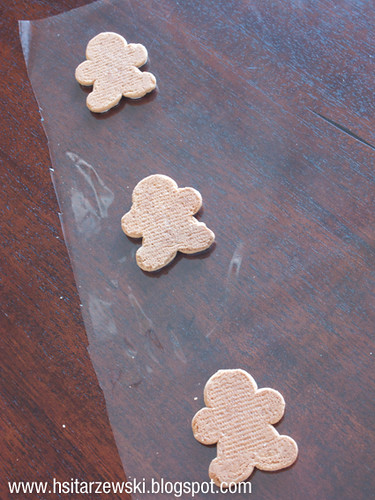
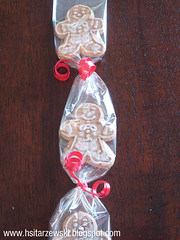
Cut out a strip of cellophane long enough for several cookies (5-6) and wide enough to wrap around the cookies about 2 times. This size will vary, depending on the dimensions of the cookies you use. I used small pre-made gingerbread cookies. Leave enough space between the cookies so that it won't crowd them when you add the ribbon. It's a little tricky to roll all the cookies evenly especially if you have a long row. An extra set of helping hands may be needed.
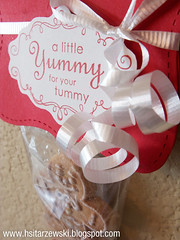
Tie ribbon between each of the cookies all the way down the strip including under the last cookie. Leave the top untied - you can seal the top with a creative header card. I used the Stampin Up! Top Note die for the header card itself and a stamp and ribbon to top it off. You can get as creative as you like for that part. The die cut piece is folded and placed over the cellophane and stapled shut. The stamped image covers up the staples.
Last tie the scissors to the bottom. Voila, you have a perfectly adorable gift and a terrific way to showcase handmade cookies too. Your recipient will have a hard time deciding whether to display or eat your sweet gift!
Happy Holidays!
Sunday, December 13, 2009
"Happy Meal" Ornaments
If you've got kids then you have happy meal toys... ok, unless you are a super diligent-never-give-in-parent that eats healthy, home cooked meals all the time. =) So it doesn't have to be "happy meal toys" it can be any little toy made of hard plastic... I just found that, even before I had a little one, I had lots of happy meal toys about. They used to decorate my desk, car and knick-knack shelves. Now they abound in toy boxes, on stairways and still in my car!
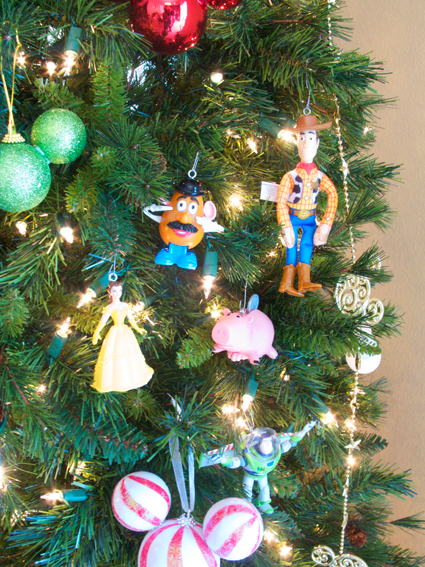
I came up with a creative way to put them to good use a few years back and now that I have this blog it's the perfect time and place to share this little "happy meal toy ornament" tutorial.
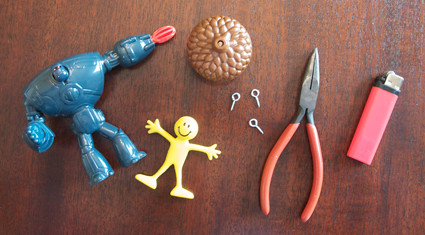
All you need is:
Pliers
Small eye hooks
Lighter
Toys
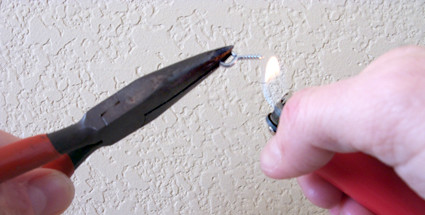
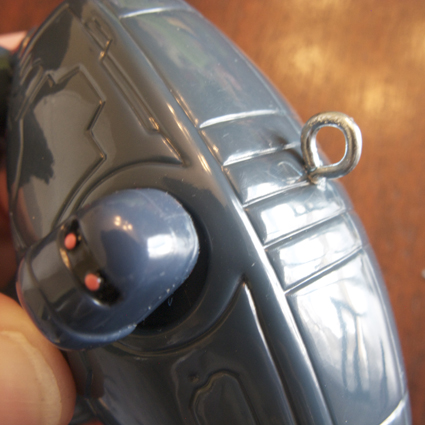
FIRST: Heat up the threads of the eye hook with your lighter, not too long, just long enough to get it hot enough to sink into and melt the plastic a bit. That way there is no need to drill holes and the plastic will melt and conform around the threads for a very secure hold. (Be careful with this step and please don't burn yourself).
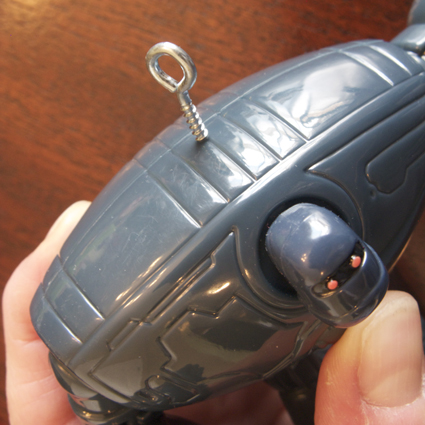
NEXT: Place eyehook in posistion on the toy. Use pliers to screw in hook while it's hot as far as it will go. Let cool.
LAST: Put hangers through the hooks and hang on tree. Step back and admire your handiwork and drink some hot chocolate. =)
OPTIONAL: For a more festive look decorate the ornaments with paint, glitter, jingle bells, santa hats. etc.
Here's to clearing your floor of toys and creating wonderful holiday memories!
Labels:
family fun,
hand made,
holidays,
ornaments,
tutorial
Wednesday, December 2, 2009
Fun New Christmas Friend
Do you know of Johanna Parker? Well, if you love Halloween and holidays in general and love to decorate with fun knick-knacks then you *must* check out her site and see her lovely creations. I found out about her through Martha Stewart's "Dreamers Into Doers". The timing was amazing, I received the email about Johanna, checked out her website and blog and discovered she was having a Halloween show about a week later in my area! She's here in CO too.
I was able to go to the show, meet her in person and of course - bring home one of her amazing cat sitter figures (which I just love, love, love!) Johanna is as sweet as her handcrafted goodies and I really enjoyed talking with her about her art and goods! Needless to say, I was feeling very inspired after meeting her and had all kinds of grandios ideas for projects I wanted to try and to interview her for my blog (which I still hope to do... after the holidays, yeah, that's it!!! I'll put it top of the list for next Halloween.) Alas, many other things sucked my attention and the rest of October and November flew by.
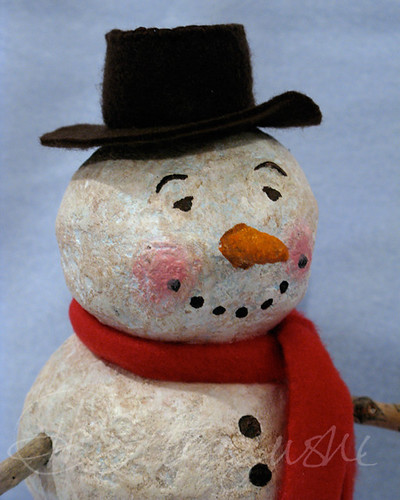
In the back of my mind I couldn't let go of wanting to try papiér mache figures. I put together an armature of balled up pieces of newspaper to make a snowman. He sat on my desk for several weeks while I pondered the best way to go about putting him together. I asked Johanna for a few pointers on what to use and any tips she could offer. It almost felt like asking a magician to reveal her secrets. She was very gracious however, and gave me enough info to dig in and get my hands dirty!
All I can say is WOW! Playing with papiér mache is F-U-N!!! After a few layers, sanding, painting, altering and making accessories I now have a really cute (IMHO) Johanna inspired Snowman! Not to mention complete respect for her art, craftsmanship and deatil! So, thank you Johanna, for your amazing creations and for sharing!
She has another show coming up this weekend,if you are in the area go see her. Check out her site for more information and be prepared for papiér mache creatures to take over your decor! Look at the pics from last year's show from her 1939 Cottage house. It's simply spectacular with all the attention to the retro details! I can't wait to see it and bring home more goodies for the holiday season!
Labels:
art,
crafts,
hand made,
holidays,
Johanna Parker,
papiér mache
Sunday, November 29, 2009
Dear Santa

It's that time! The time when all the little ones start making their lists to give to Santa! My little one is big enough to write his own list this year (with a little spelling help form mom and dad) so I thought it would be cute to make an "official list" for him to work on. So far it's got some pretty cute requests and I hope Santa can find everything! (Image above is not what my little guy is asking for. It's a sample only =)
The list was cute all by itself, but I took it a step further and created a folder pocket for it as well. That way the little ones can cut out images in magazines or draw their own pictures of the things that interest them to put in the folder for reference. Santa needs all the help he can get these days, right?

This would be a cute gift to give on one of the first days of December as an advent calendar "goodie". You could bundle it with a festive pencil and they can get started right away!
You can download the Dear Santa page and get the instructions below for putting together your own folder. Here's to smooth sailing holidays! I hope this helps you get off to a great start.
HOW TO MAKE YOUR OWN DEAR SANTA FOLDER
1. Print out the Dear Santa page. You can print 2 up on an 11x8.5 page as long as your printer will print to the edges. Otherwise, print one and cut out.2. Take a 12x12 piece of colored card stock (I used green, you could use red or even decorative paper) and see diagram below for cut and score marks.
3. Cut the paper at 9".
4. Score the paper at 6.25/5.75 so one side is a bit wider than the other. The smaller side should still be large enough to fit your 5.5x8.5 list page.
5. Use sticky strip or glue to attach the top and bottom edges of the folder.
6. Use a scallop punch or deckled edge scissors to embellish the back edge. (optional)
7. Adhere the list to the top of the folder. (I added a gem brad to the top snowflake, you could also glitter them or embellish in other fun ways if you like)
8. Give to your list makers and watch the wheels turn in their little heads.
Diagram of cuts and folds


Labels:
crafts,
digital art,
family fun,
free download,
holidays,
tutorial
Sunday, November 8, 2009
The World Looks Mighty Good to Me...

Oh, the world looks mighty good to me,
'Cause Mickey Mouse is all I see.
Whatever it is I think I see
It becomes a Mickey Mouse to me
Mickey Mouse, Mickey Mouse woohoo
Mickey Mouse I think I'm in love with you.
Whatever it is I think I see
It becomes a Mickey Mouse to me.
Ok, so perhaps I just went a bit overboard with repurposing the 1970's Tootsie Roll jingle. But it fit so well! It's true, I see Mickey's all over and if they don't exist for real, I make them. This is the wreath on my front door. I've attached three grapevine wreaths together and I change out the foliage throughout the year to correspond to the seasons. Christmas being the only exception... I made a Mickey head out of pine wreaths...
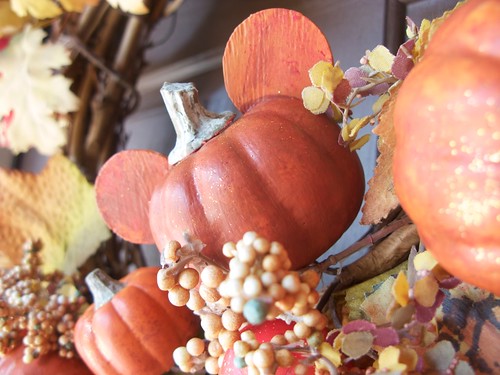
For Fall, I have pumpkins on the grapevine wreath. And of course the pumpkins are Mickey's too! They were almost as simple as the new ornaments I concocted.
It starts with pumpkin garlands (Check your local craft stores right now, most of them are on sale 50%+). The ears are made from wooden circles. You just carve a little niche in each side the pumpkins with an xacto knife (btw, the xacto knife is one of the "must have tools" in my craft box).
Glue the ovals in the slots and paint to match the pumpkin. I had to completely repaint the pumpkins this year because they got rained on last year and faded pretty badly. I recommend coating with a sealer or mod podge. Seems to have solved the runny/faddy problems this year. I also added a little sparkle to them with glitter.
You can see that the grapevine sections are loose and wonky, it's about 7 or 8 years old and in need of a little maintenance itself. Perhaps I can repair or replace after the holidays this year when the pine version gives it a break!
Happy Holidays!
Labels:
Disney,
hand made,
holidays,
Mickey Mouse
Friday, November 6, 2009
Surprise Ornament

Are you thinking what I'm thinking...
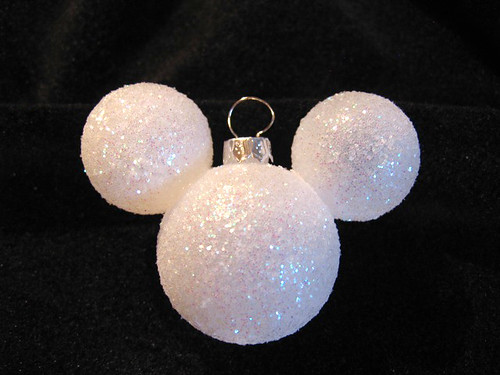
A Mickey Mouse head ornament right???
You're not? Well, hold on! You'll see...
I couldn't believe how quick this went together! No glue, very little mess, no fuss! I'll be heading back out for more colors to completely fill my tree with these little beauties this year! Let me show you just how simple it is and I bet you'll have a few on your tree too!
What you need:
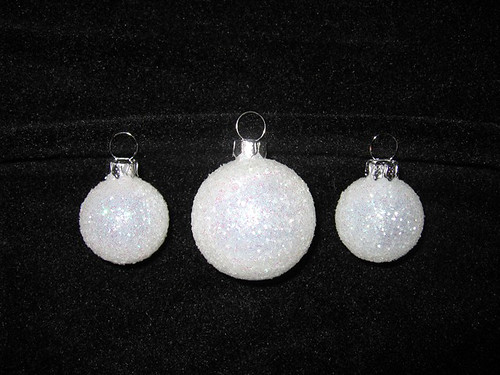
2 sizes of plastic glittered ornaments
(check your local craft stores for 50% deals!)
Xacto knife
That's it!
STEP ONE

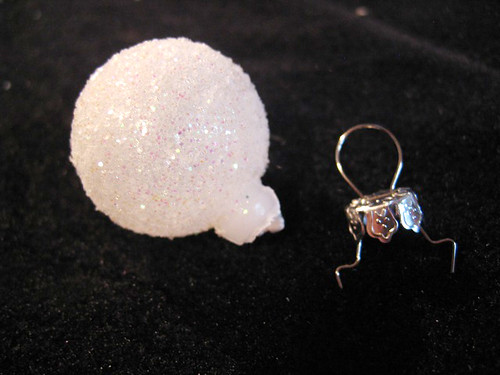
Remove hanger from 2 smallest ornaments
STEP TWO

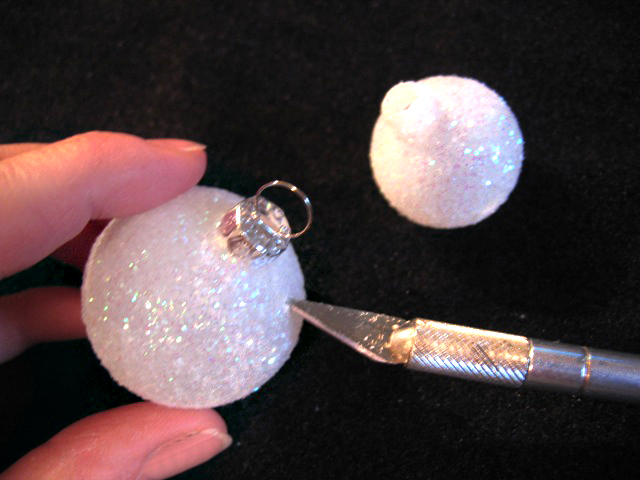
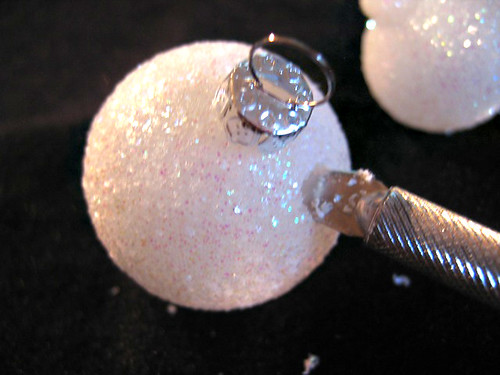
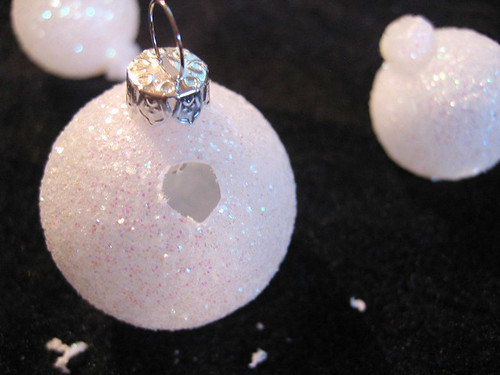
Gently start poking hole in larger ornament close to the hanger with Xacto knife. Turn blade clock wise increasing pressure each turn to carve away hole until it is slightly smaller than neck of smallest ornament. Repeat on opposite side.


For the size of ornaments I used, the width of the largest part of the blade was the perfect fit.

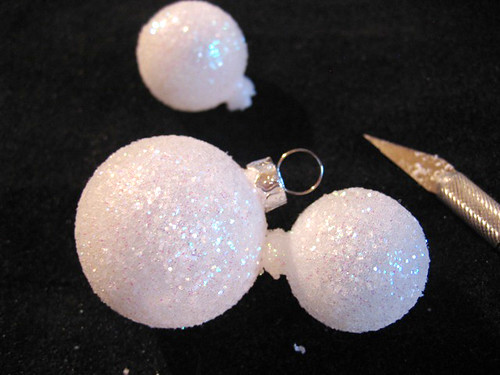
Line up the neck of the smallest ornament with hole and gently twist into hole. Repeat on other side. Be carful not to push too hard or you could crease the plastic which leaves a bright "scar" across the bend.

Voila! There you have it! A perfectly adorable Mickey Head ornament! I told you it was easy! How many will you make? Please link back and share your creations if you make some! ºoº
Monday, November 2, 2009
Handmade Halloween
I hope you had a great Halloween! We sure did here at the Zooski household. I had tons of projects planned for the month and as you know the best laid plans sometimes go awry. Now that the festivities are over and I feel like I have a moment to breathe, I'll share some of the handmade goodies that were actually completed.
For this first post, the costumes.
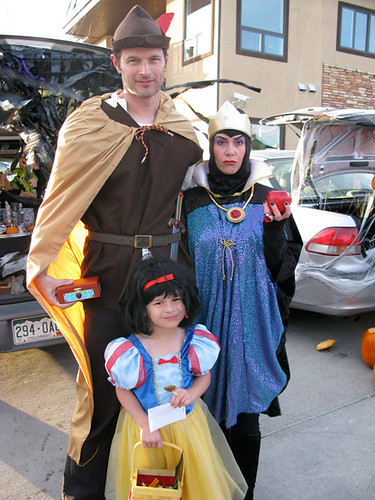
I was feeling a little guilty for not going "all out" and completely making our costumes this year. Although they started from thrifted and second hand pieces so it wasn't *so* bad. Z found the Evil Queen costume on a thrift store excursion and insisted that I get it to wear for Halloween. He let me know that if I would wear the Evil Queen he could be Snow White. (We do love our themed costumes.) And no, it wasn't odd for me to hear my 5 year old boy asking to dress as a girl (although the conversations that ensued from the simple question of "What are you going to be for Halloween" are topic for another blog post). He's very creative... and so I agreed, the Evil Queen costume was pretty cool and even if he changed his mind I wasn't out a lot of $$$.
The hunt was on to find a used Snow White dress. As much as I love the Disney Store costumes I couldn't bring myself to pay $30-$60 and the off brands are usually not made very well. Plus, I was feeling guilty, remember. I scoured craigslist and found a few then finally made the pick-up one sunny day in mid-September, all the while wondering if he would change his mind. He was pretty excited about it though, so I ran with it.
For the Snow Whiite costume I purchased new white tights and wig. I found some cute sparkly red shoes at Gymboree (from last year) on sale for $5. Bonus! Now for a bit of the handmade: I did alter the dress by removing the medallion on the front of Snow White's face and replaced it with the bow. I also added a zipper instead of the two cheesy velcro "buttons" on the back. Much better! Plus I painted a little wicker basket yellow, made a red fabric liner for it, sprayed it with glitter and tied a red bow around it.
The Queen's costume came with the crown and an odd piece of cording I couldn't figure out what to do with (at first). It became the "chain" for the medallion necklace. The medallion is made from a metal jar lid, the metal end from refrigerated biscuits, some paint, a sparkly red gem and glitter. Again I removed the Queen's face from the costume and the crown. My new medallion necklace covered up the spot perfectly, and looked much better than the Queen's face. I think that's silly, you know who the character is, you don't need a little picture to show you. I also sewed in some wire to the collar to make it bend the way I wanted and not just flop around.
So now all that was left was the balaclava (the head piece), I had to make it because I couldn't find one. Had I known how difficult it was going to be to make I may have looked a little harder to find one! It was a great learning experience however, and after a few failed attempts I now I have a working template. You know, in case I need to make a dozen more for some reason! But for the record I scored a scrap piece of fabric at Joann's that matched the black fabric of the costume perfectly! I wish I had actually made a new crown that was a bit more accurate, but I ran out of time.
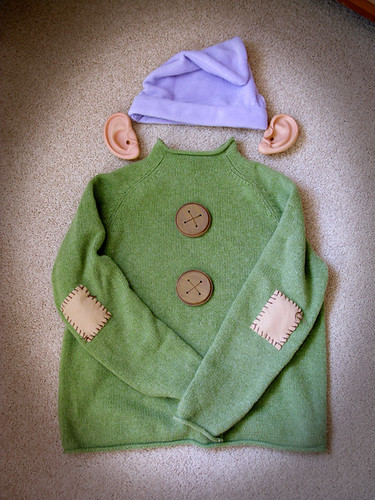
Z and I got to wear our costumes at the Disneyland Happy Halloween party first. My best friend from Texas was with us on the trip and she dressed up like Dopey. We found a green sweater at a thrift shop for her and I embellished it with patches on the sleeves and button on the front. I had been itching to use the lids from Z's little microwavable meals as buttons for a while but couldn't seem to come up with a project to use them on. This was perfect! I just primed and painted them brown to look like little wooden buttons and sewed them on with embroidery floss. They already have the 4 holes in the center, they couldn't have been more perfect! I made her hat with lavender fleece (from my fabric stash) and we got her some big ears (which didn't stay on very well - I even tried to to sew them to the hat, but that didn't work very well either). Poor thing, it was too hot to wear a wool sweater and fleece hat in California anyway, so we had our picture taken together real fast and she changed. Bummer... but you know it was snowing in Colorado when I left, so a sweater seemed perfectly reasonable! And, the picture was taken with her camera, when she sends them to me I'll add it!
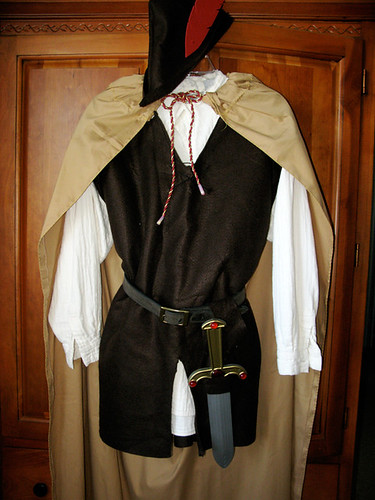
Back home the festivities were far from over. We had a Trunk-or-Treat event at school and of course we had to plan Daddy to be in on this somehow too. I suggested he wear the Dopey outfit, to which he adamantly refused. Early on we had talked about him being the Huntsman and I was trying to save myself a little work since the Dopey getup was already done. Alas, I whipped up a few Huntsman pieces too. I used last years Han Solo shirt, another thrifted piece for the vest which I cut off at the bottom to be able to use the same fabric for the hat and sword sheath. A piece of red craft foam made a nice makeshift feather! I embellished a thrifted dagger with more red sparkly gems, and used a thrifted piece of fabric for the cape (tied with a piece of cording left over from my handmade Beauty and the Beast Enchanted Christmas dress). I think it turned out pretty awesome for a last minute effort.
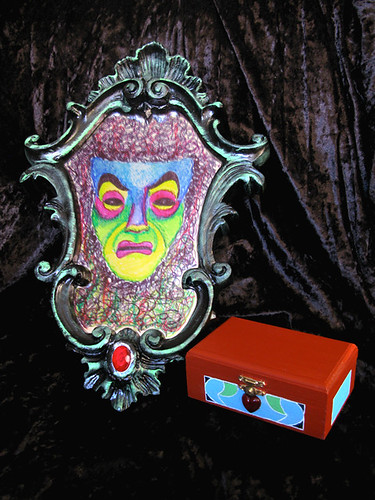
I made a few other props for us as well. The Queen needed her Magic Mirror after all. And the Huntsman needed the box to put the heart in. Neither of which are accurate, but they get the point across. So my not-so-handmade-halloween does have lots of handmade elements but most importantly made a little, 5-year old kiddo very happy! And they lived happily ever after.
The End.
Sunday, September 14, 2008
More Halloween Fun
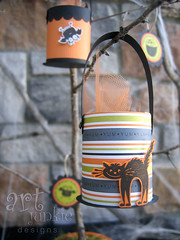
Here is a super fun treat basket project that will delight your little Trick-or-Treaters. It can be used for so many occasions, not just Halloween. It's so easy and it's a recycled craft. Love that.
Here is what you'll need:
- Paper towel or Toilet paper rolls
- Themed paper and card stock
- Stamps, punches, adhesive and embellishments (ie. ribbon, brads)
Instructions
- Cut towel rolls into 2" strips. Use a paper template to trace sections and cut carefully with hobby blade.
- Cut paper (2 per container) into 6" x 2" strips to adhere to outside, and coordinating stock for inside. (Use strong adhesive like Sticky Strip)
- Punch or cut 2" circles for the base. Attach to tube with a liquid glue like Tombow or Crystal Effects
- Cut 3/8" x 5 1/2" strip for handle, punch 1/16" holes in each end and round ends if desired.
- Punch 1/16" holes in decorated tube and attach handle with brads.
- Embellish with stamped image cutouts, ribbon, etc.
- Voila! Fill with candy corn or small treats and hang on tree.
(I made extra stamped medallions to hang on the tree like ornaments as well. Stamps used: Batty for You, Halloween Frights. Paper stock used: Ghostly Greetings. Other Supplies: 1 1/4" circle punch, 1 3/8" circle punch, scallop punch. All products are Stampin' Up!
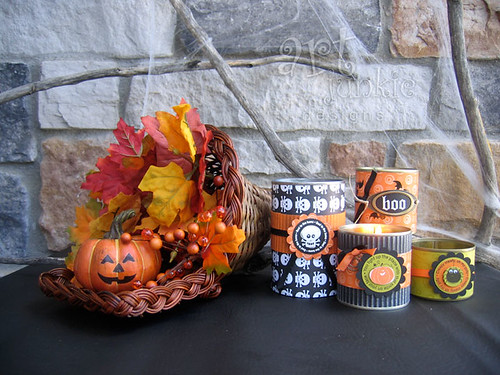
Luminaries. More goodies made from various size tin cans and the same paper set, Ghostly Greetings. Embellished with stamped and punched pieces, ribbon, rub-ons and hodgepodge hardware. Just drop in votives and light up your Halloween! The face of the pumpkin is also a rub on from the Chills & Thrills set from Stampin' Up!
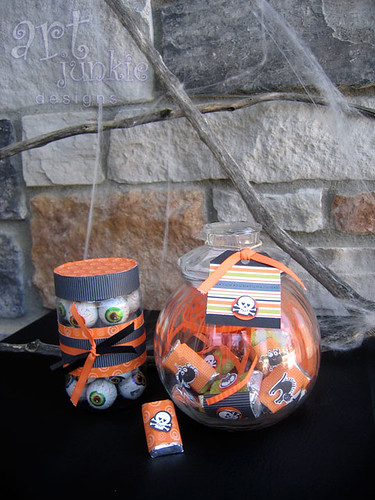
Candy Containers. I've used Ghostly Greetings paper agian to wrap a peanut butter container that now houses the creepy eyeball candy. It's used on the individual chocolate bars as well. The possibilities are endless. My family may be sick of candy by the time Halloween really gets here this year. Oh, wait. I have to actually let them eat it to get sick of it. =)
If you decide to make any of the things I've shown send me links! I'd love to see what other people come up with.
Here's to 46 more days until Halloween!
Wednesday, September 3, 2008
Halloween Treats and Cool Colors
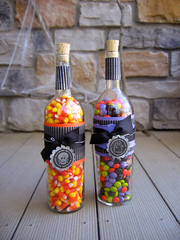
Just a quick note on how well the halloween M&Ms match Stampin' Up! colors. (Lovely Lilac, Kiwi Kiss, Only Orange and Basic Black). I've been saving these wine bottles for ever and didn't really know what I was going to do with them. They make lovely candy-holder-decorations.
I've just taken crimped black paper and lightly rubbed a silver ink pad over it to give it a metallic-grungy look. Layered on colored card stock, ribbon and super long twist ties (from toy packaging - again one of those things that looked like something could be done with, so saved...). Little medallions were made with the Stampin' Up! "Batty for you" set and dangle from a loop made with the twist tie. Topped with cork stoppers from the craft store and voila! Very cute Halloween themed decoration.
What a great treat to make for a halloween nut you know! The trick will be not eating all of the candy yourself.
More halloween themed crafts in the works...
Sunday, August 17, 2008
Getting ready for the holidays
I LOVE fall. I love the smell, I love the weather, I love the changing leaves, I love a comfy sweater and most of all I love making things. Halloween is probably my favorite and now that my little one is old enough to be excited about it too, this year is gonna rock! I'm already on it. Of course I am in the OMG it's August-I-need-to-make-all-my-Christmas-presents mode as well!!!! Halloween first though.
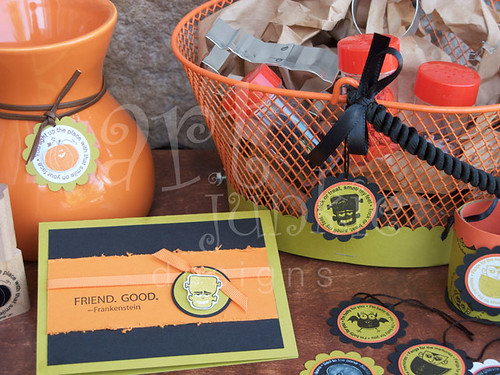
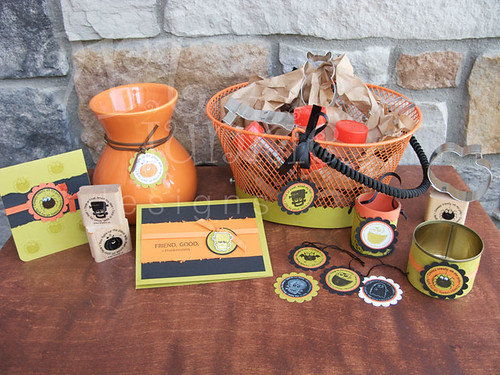
I save all sorts of things I think may come in handy for craft projects and this time I'll get to put all those paper towel rolls to good use for the candy containers (thanks to a great demonstration at the Stampin' Up! Convention)! Some random cans will make lovely votive holders. A few thrift store finds have become pretty decorations as well. The orange vase only needed the little stamped pumpkin medallion to dress it up. The orange basket needed a new handle and thanks to a coat hanger and some black cording it now has one. I dressed it up with a cute Frankenstein medallion and scalloped punched paper stapled together and bolts through each side =)
The basket will eventually hold the candy bags. I picked up a pack of halloween cookie cutters at the last thrift store spree, hope to find some more. I'll place them in cellophane bags with candy corn etc. and tie them with ribbon and the extra stamped medallions. I also made a few halloween cards just for good measure.
The stamp set used is "Batty for You" and the Frankenstein sentiment is from "Smarty Pants". Both Stampin' Up sets. The papers, ink and ribbon used are Kiwi Kiss, Tangerine Tango, Pumpkin Pie, and Black. I can hardly wait to order the new Halloween paper and make all these things again. I'll be putting a class together soon showing how to make these great decorations so be sure to check out my stampin up site for class dates.
Who knows maybe I'll actually get super into Halloween and make my own candy corn too with this great recipe I found last year. (It's vegan friendly, btw.)
Now if I can just get Z to settle on the costume so I can start making that. Right now he's flipping between Astronaut and Donald Duck... stay tuned to see what his decision will be!
I save all sorts of things I think may come in handy for craft projects and this time I'll get to put all those paper towel rolls to good use for the candy containers (thanks to a great demonstration at the Stampin' Up! Convention)! Some random cans will make lovely votive holders. A few thrift store finds have become pretty decorations as well. The orange vase only needed the little stamped pumpkin medallion to dress it up. The orange basket needed a new handle and thanks to a coat hanger and some black cording it now has one. I dressed it up with a cute Frankenstein medallion and scalloped punched paper stapled together and bolts through each side =)
The basket will eventually hold the candy bags. I picked up a pack of halloween cookie cutters at the last thrift store spree, hope to find some more. I'll place them in cellophane bags with candy corn etc. and tie them with ribbon and the extra stamped medallions. I also made a few halloween cards just for good measure.
The stamp set used is "Batty for You" and the Frankenstein sentiment is from "Smarty Pants". Both Stampin' Up sets. The papers, ink and ribbon used are Kiwi Kiss, Tangerine Tango, Pumpkin Pie, and Black. I can hardly wait to order the new Halloween paper and make all these things again. I'll be putting a class together soon showing how to make these great decorations so be sure to check out my stampin up site for class dates.
Who knows maybe I'll actually get super into Halloween and make my own candy corn too with this great recipe I found last year. (It's vegan friendly, btw.)
Now if I can just get Z to settle on the costume so I can start making that. Right now he's flipping between Astronaut and Donald Duck... stay tuned to see what his decision will be!
Subscribe to:
Posts (Atom)